Appearance settings
Colors, logo, bubble style, welcome — all with a live preview.
The editor on the Widget page shapes every part of the bubble and the chat window to your brand. The live preview on the right reflects each change instantly; don't save until you like what you see.
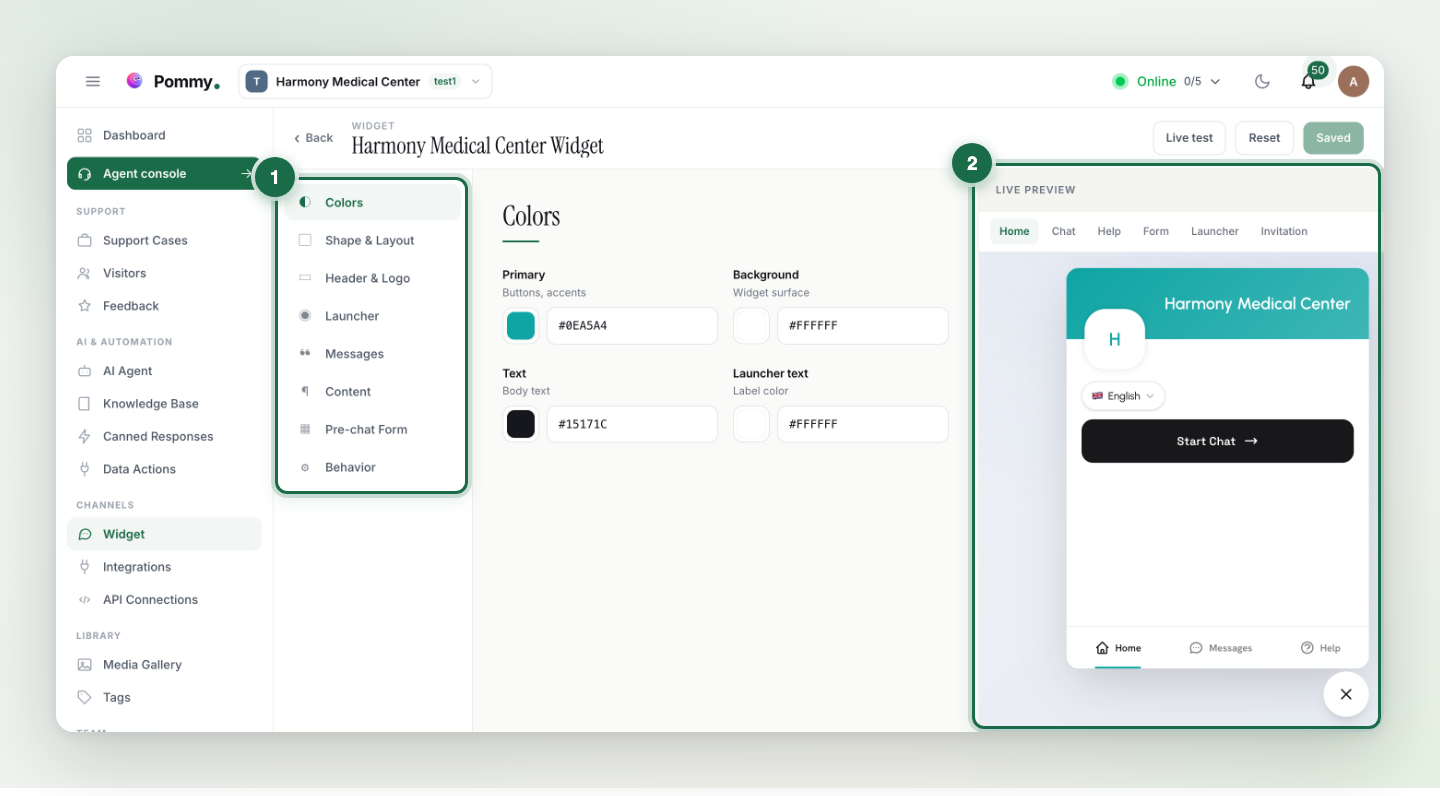
What you can change#
- Brand color — the main color of the bubble, header and buttons. Pick a light color and the text darkens automatically to stay readable.
- Logo and cover image — shown in the chat window's header.
- Bubble style — Brand (a solid bubble in your color) or Light (a bright, frosted look).
- Bubble icon — one of the ready-made icons: chat, envelope, support and more.
- Bubble label — the short call-to-action next to the bubble (e.g. "Chat with us").
- Welcome message — the first message that greets the customer when the window opens.
- Position — bottom-right or bottom-left corner.
The pre-chat form#
The editor's Pre-chat Form section controls what the customer fills in before the conversation starts — typically full name and phone, plus their preferred language. What's collected here appears in the Agent console's customer panel and feeds the booking form, so the assistant doesn't ask again for what it already knows.
What language does the widget appear in?#
The widget's interface adapts to the visitor's browser language; the AI's reply language is a separate setting managed on the AI Agent page (see the AI Assistant section).
Tip: Saved appearance changes go live on your site immediately — no need to touch the install code again.