Installing the widget
Copy the install code, paste it into your HTML, done.
The widget installs with a single snippet of code. The code sits ready in your dashboard, already tied to your project — there's nothing to write by hand.
- Copy the code
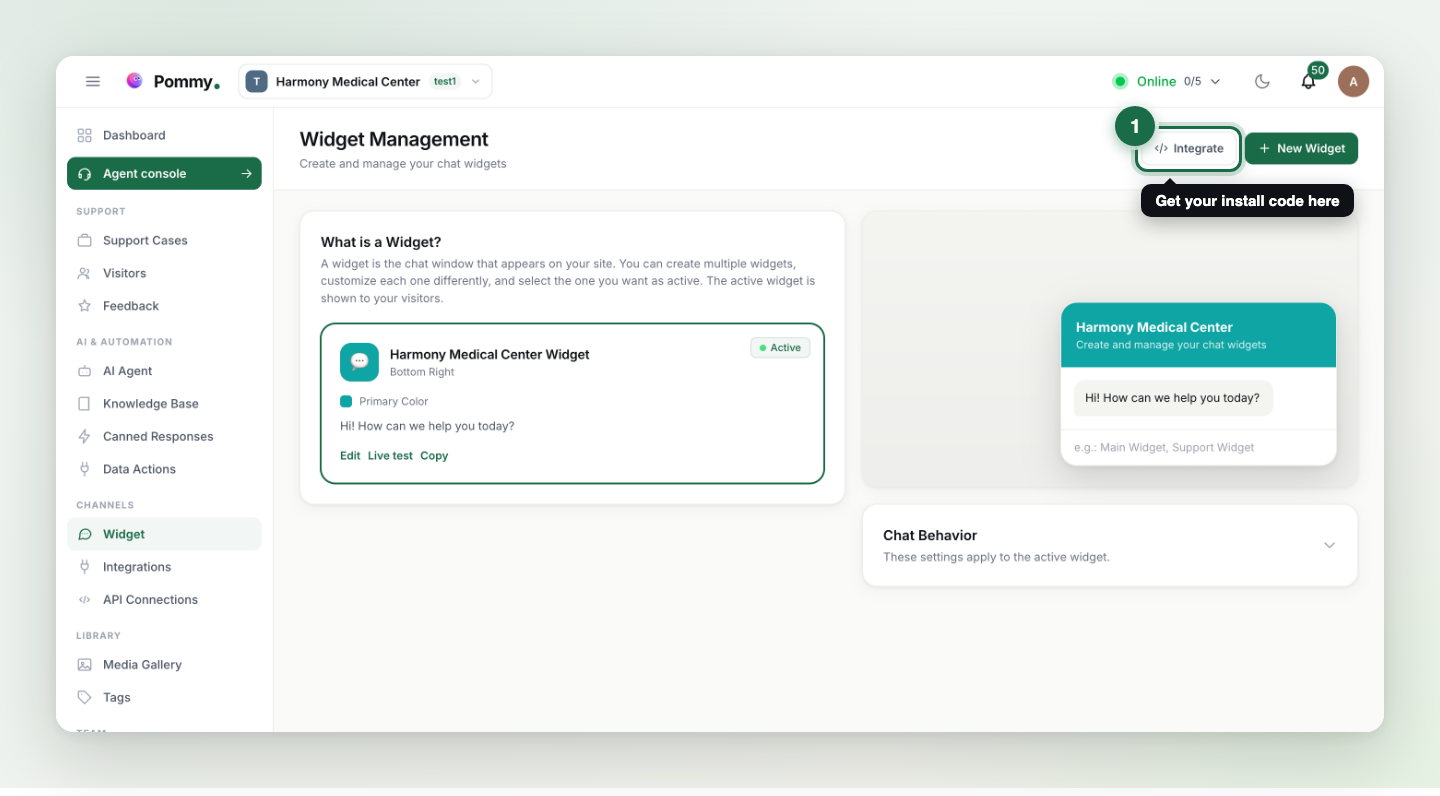
Open the Widget page from the left menu and click Integrate; copy the code with Copy Code.
- Paste it into your site's HTML
Place the code somewhere that loads on every page — ideally just before the closing
</body>tag. On platforms like WordPress, Wix or Shopify, it goes into the "custom code" area. - Check it
Refresh your site; the chat bubble should appear bottom-right. If it doesn't, see "The widget doesn't show up" in the FAQ section.
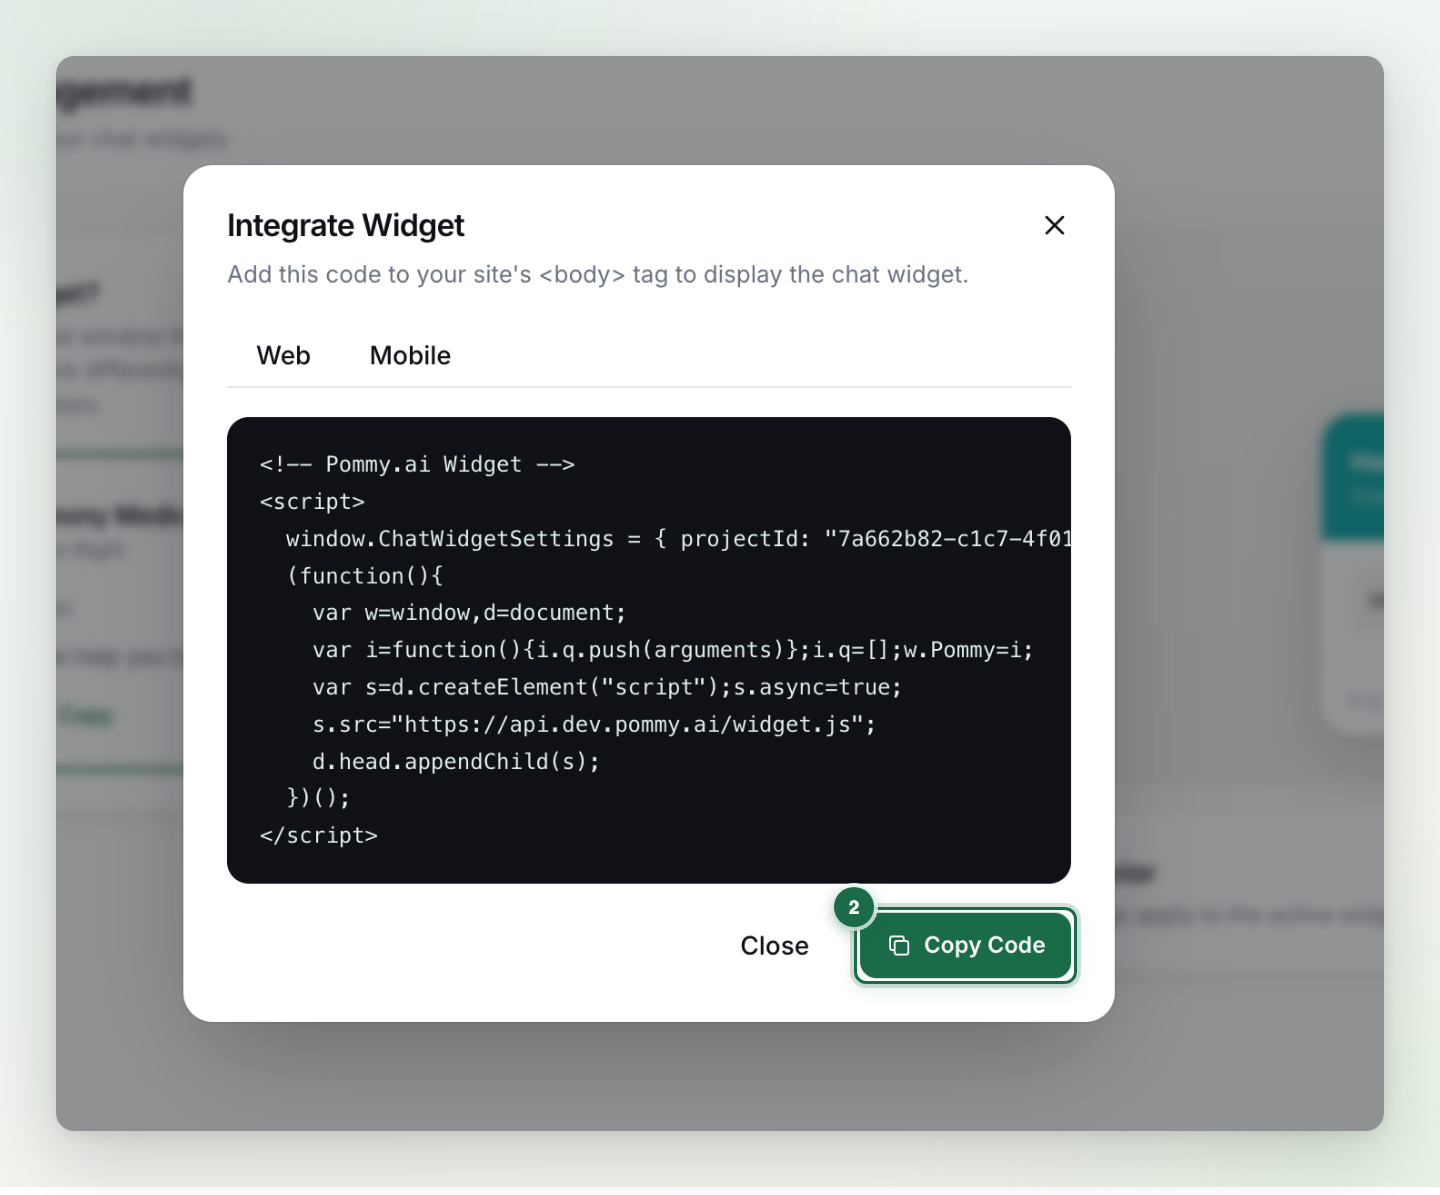
The code looks like this (yours comes pre-filled with your project ID and address):
<!-- Chat Widget -->
<script>
  window.ChatWidgetSettings = { projectId: "YOUR-PROJECT-ID" };
  (function(){
    var w=window,d=document;
    var i=function(){i.q.push(arguments)};i.q=[];w.ChatWidget=i;
    var s=d.createElement("script");s.async=true;
    s.src=".../widget.js";
    d.head.appendChild(s);
  })();
</script>Rule: Always copy the code from the dashboard — the example above only shows the shape; the project ID and address are unique to you.
Test it before going live#
You don't need to touch your real site to try things out: the Live test button in the widget editor opens a demo storefront with your real widget embedded, exactly as customers will get it. Open it, have a conversation, book a test appointment — then go live with confidence.
Tip: You can also try the widget on a single page of your site first (a hidden test page works well) and roll it out site-wide once you're happy.